Thursday, February 17, 2011

SAP Pi Netweaver Project


hi,
I'm now working on SAP Pi Netweaver, it is in-house development where i need to expose some activities from SAP to view on web portal . The activities are for  Service Acceptance (SE) and Service Approval (SA) process. Since the approval usually from a big bosses and they prefer to use web instead log in into SAP itself.
This task is involved our MM modul team and on development 3 person involve and me will incharge under the SAP PI Netweaver and others 2 person is incharge under Bapi / function and sharepoint development.

  • Basically my task is to import the bapi/function from SAP to PI Netweaver via RFC. 
  • Do the design and mapping activities to create the WSDL file for SOAP communication.  
  • For validation i used microsoft infopath to test the webservice working.
I'll updated later the work have been done for this webservis.

Wednesday, February 16, 2011

Abap Multiple Table Popup Search Help

If you are SAP abaper, might be you have exprienced to create a search help. A standard process which does not involved any programming where you can created it through SE11 . This implementation might be easier if only involved one or two table.How about multiple table popup search help ?  you might be face this problem if you are required to create a search help which involve more table relationship.

image credit to : http://wiki.sdn.sap.com

you can used this function F4IF_INT_TABLE_VALUE_REQUEST, which is used to display ABAP internal table as an SAP Search Help. To use the code you can refer as below example. The steps:
  1. write select statement to select data from multiple table and stored into aninternal table.
  2. determine one field to be a retrieved field, example date.
  3. call the function F4IF_INT_TABLE_VALUE_REQUEST and set a proper value.
form get_searchhelp_data.
clear itshpo.
select
e~ebeln
d~txz01
e~aedat
into table itshpo
from proj as a
inner join prps as b on b~psphi = a~pspnr
inner join afvc as c on c~projn = b~pspnr
inner join eban as d on d~banfn = c~banfn
inner join ekko as e on e~ebeln = d~ebeln
where a~pspid = pspid.

if sy-subrc = 0.
sort itshpo.
delete adjacent duplicates from itshpo.
endif.
endform.
perform show_searchhelp_popopwin tables itshpo using ‘ZPSCHED33-ZPOSIA’ ‘ AEDAT’.
form show_searchhelp_popopwin tables p_tab
using value(screenfield)
retfield.
call function ‘F4IF_INT_TABLE_VALUE_REQUEST’
exporting
retfield = retfield “‘AEDAT’”field from int table whose         value   will be returned
dynpprog = sy-cprog
dynpnr = sy-dynnr
dynprofield = screenfield
value_org = ‘S’
tables
value_tab = p_tab”internal table whose values will be shown.
exceptions
parameter_error = 1
no_values_found = 2
others = 3.
endform.

Abap put Negative sign on the Front

In SAP Abap, by default the Negative Sign will be put on the last, for example -600 will be shown as 600-, quite weird to be display to the customer. instead if you are required to view the data into another platform such as send email as Ms Excel, PDF and viewed by non abap people, sure you will be trouble.


Tradisionally you could use your logic to extract the sign by implement the Concatenate function. Since the SAP is provided us a variety of call function, just call this functionlfunction: CLOI_PUT_SIGN_IN_FRONT.
data: temp(30) type c.
call function  ’
CLOI_PUT_SIGN_IN_FRONT 
changing
value =  temp.


just make sure you firstly convert your currency / number type into String type. Done !.

Abap send email with excel attachment

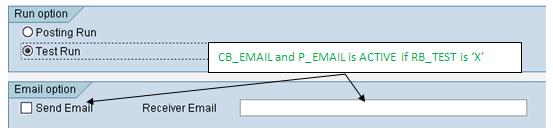
i just finished on of my SAP report requested by my user. The report need to run automatically once a month and send an email with EXCEL attachment to keep the result.

image credit to : wiki.sdn.sap.com

if you are using SAP ECC6, search for this example BCS_EXAMPLE_7 : Send Emeail with Excel attachment. from this example its will send email to the email receiver with excel attachment.  however the problems is, you cannot modify excel properties (such as column width, border, column color etc).

Don’t worry there always the solution, i just google around i found this solution: using excel XML to control the excel properties. What i have done was, using current code in BCS_EXAMPLE_7 and and bind the internal table contain into the excel’s XML format!!
from original BCS_EXAMPLE_7 search for form send, you will find this code :


Form create_content.

concatenate lv_string
ls_t100-arbgb gc_tab
ls_t100-msgnr gc_tab
ls_t100-sprsl gc_tab
ls_t100-text gc_crlf
into lv_string.

try.

cl_bcs_convert=>string_to_solix(
exporting
iv_string = lv_string
iv_codepage = ’4103′ ”suitable for MS Excel, leave empty
iv_add_bom = ’X' ”for other doc types
importing
et_solix = binary_content
ev_size = size ).
catch cx_bcs.
message e445(so).
endtry.


and append the internal table into lv_string using the Excel’s XML  hierarchy.
your new LV_STRING could be coded as:

concatenate lv_string
‘<?xml version=”1.0″?>’
‘<?mso-application progid=”Excel.Sheet”?>’
<Workbook …. ‘  “XML header, please refer or link example as attached
:::::::::::::::::::::::::::::::::::::::::::::::::::::::::::::::::
:::::::::::::::::::::::::::::::::::::::::::::::::::::::::::::::: ” this line should be write with XML full header format
‘<Style ss:ID=”s3″>’ ” Make your Style ID
‘<Borders>’
‘<Border ss:Position=”Bottom” ss:LineStyle=”Continuous” ss:Weight=”1″/>’
‘<Border ss:Position=”Left” ss:LineStyle=”Continuous” ss:Weight=”1″/>’
‘<Border ss:Position=”Right” ss:LineStyle=”Continuous” ss:Weight=”1″/>’
‘<Border ss:Position=”Top” ss:LineStyle=”Continuous” ss:Weight=”1″/>’
</Borders>’
‘ </Style>
‘<Worksheet ss:Name=”Sheet1″>’
‘<Table ss:ExpandedColumnCount=”4″ ss:ExpandedRowCount=”9″ x:FullColumns=”1″
x:FullRows=”1″>’
‘<Column ss:AutoFitWidth=”0″ ss:Width=”135″/>’
‘<Column ss:Index=”3″ ss:StyleID=”" ss:AutoFitWidth=”0″ ss:Width=”66.75″/> ‘
‘<Row>’
‘<Cell ss:StyleID=”s3″><Data ss:Type=”String”>Row 4</Data></Cell>’
‘<Cell ss:StyleID=”s3″><Data ss:Type=”Number”>4000</Data></Cell>’
‘<Cell ss:StyleID=”s6″/>’
‘<Cell ss:StyleID=”s3″/>’
‘</Row>’
‘</Table>  <DataValidation xmlns=”urn:schemas-microsoft-com:office:excel”>’
‘<Range>R2C2:R1000C2</Range>’
‘<Type>List</Type>’
‘<CellRangeList/>’
‘<Value>”Red, Black, Green”</Value>’
‘</DataValidation>’
‘</Worksheet></Workbook> 

you also can refer to this example for your reference.

Monday, February 7, 2011

Abap Fields Symbols and Get Reference for multiple ALV report

Most of the customized report i created usually have different pattern in a single report such as the report have capability to show multiple type of result in the same sap report.  The user interface usually are always represented with radio button as below.


Each choosen radio button will represent a diffrent type of result (different number of column). If you are design your code using Object Oriented ALV, tradisionally you need to have multiple internal table for each result, such as IT01,IT02, IT03,… and you nedd to call ALV method multiple times, depending on number of your internal table and definately in my own opinion it is not good for programming implementation if we always repeating same method for the same purpose !

Abap multiple selection-screen using radio button

It is really general to have an Abap Report which have Multiple Output for single AVL or report list.  On selection-screen usually we will use Radio button as command option, how to control the radio button action to work as below configuration?


 *Run option
selection-screen begin of block blca with frame title text-t0a.
parameters:   rb_post radiobutton group rb1 default 'X' user-command tuc1,
              rb_test radiobutton group rb1.
selection-screen end of block blca.
*Email option


selection-screen begin of block blcb with frame title text-t0b.
selection-screen begin of line.
parameter cb_email as checkbox.
selection-screen comment (10) text-p02.
selection-screen comment 20(15) text-p01.
parameter p_email type ad_smtpadr.
selection-screen end of line.
selection-screen end of block blcb.


at selection-screen output.
  loop at screen.
  if rb_test = 'X'.
    if screen-name = 'CB_EMAIL' or screen-name = 'P_EMAIL'.
      screen-input = 1.
      modify screen.
    endif.
 elseif rb_post = 'X'.
   if screen-name = 'CB_EMAIL' or screen-name = 'P_EMAIL'.
      screen-input = 0.
      clear p_email.
      clear cb_email.
      modify screen.
    endif.
  endif.
 endloop.


Importance things you need to insert ‘User-Command ‘ key . this user-command will automatically trigger the At-Selection screen output to run the command from radio button.